
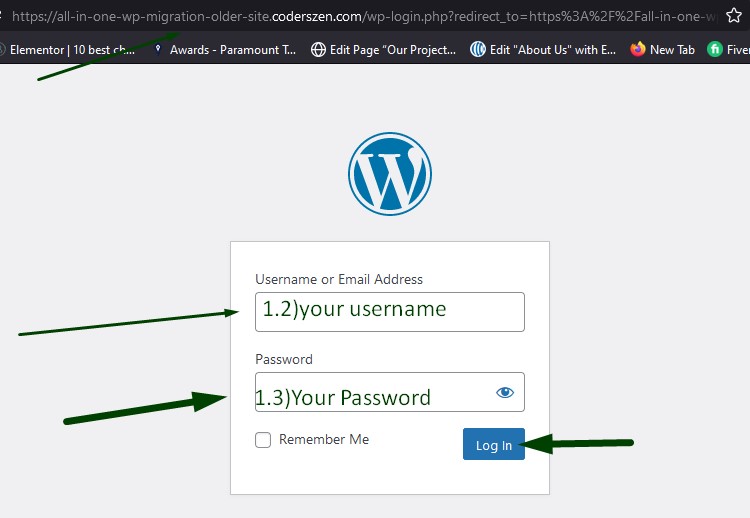
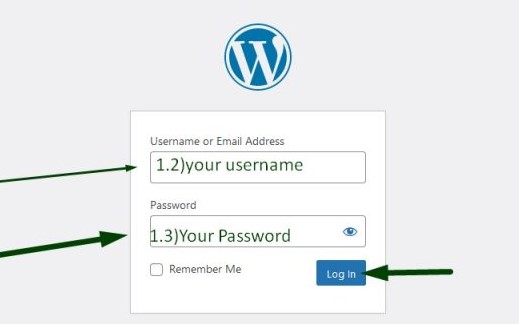
1.1, 1.2, 1.3 Login
Login your old site wordPress dashboard. If you haven't your old site login access , you can login by cpanel or hosting panel.
For login you can follow the link structure https://your-domain-name.com/wp-admin
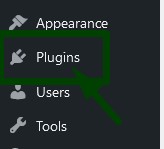
1.4 click on plugins
After login your wordPress dashboard you will get a option which called Plugins click on it.
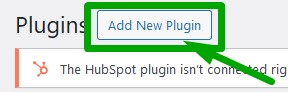
1.5 click on add new plugin
Now, click on add new plugin
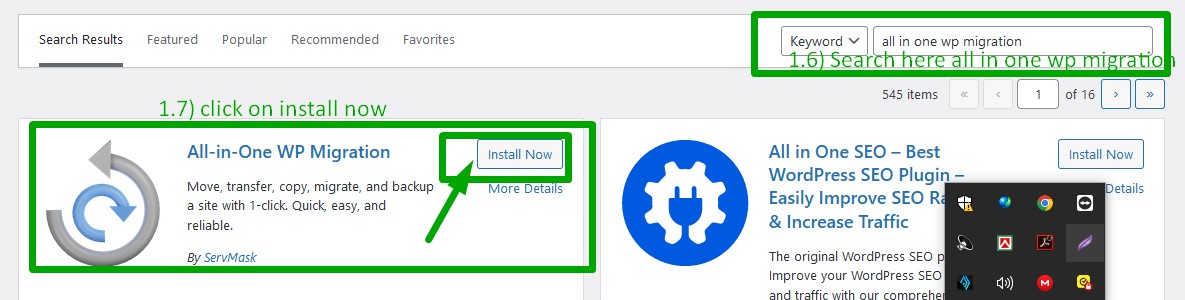
1.6, 1.7 search and install
In the search box write the name all in one wp migration and than you will get a plugin which have same name.
1.7 click on install
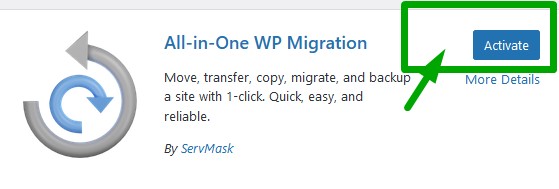
1.8 activate
Now, click on activate for active the plugin.

1.9 backups
From wordPress dashboard left hand site click on all in one wp migration and than you will get a new option backups click on backups
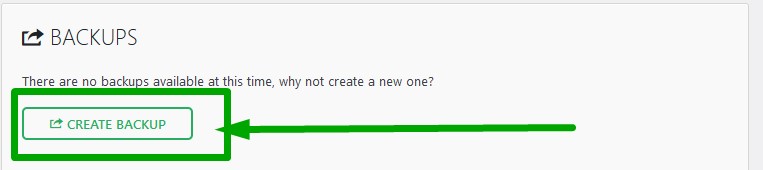
1.10 create backup
Now, click on create backup . It will take some minutes or seconds to complete the backup process
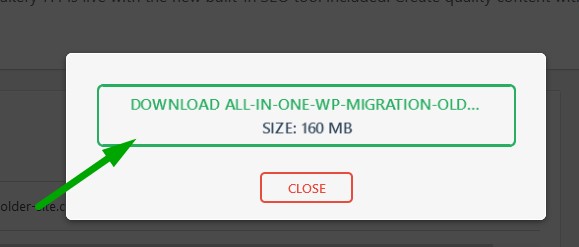
1.11 Download
After complete the backup process you will get the option for download the backup files. So, click on download from the popup.
2.1, 2.2, 2.3 Login
Login your new site wordPress dashboard. If you haven't your new site login access , you can login by cpanel or hosting panel.
For login you can follow the link structure https://your-domain-name.com/wp-admin
If there wordPress hasn't installed you should installed it. please, follow the link for learn about one click wordPress installation it will take only one or two minutes
One click wordPress installation in live server
2.4 click on plugins
After login your wordPress dashboard you will get a option which called Plugins click on it.
2.5 click on add new plugin
Now, click on add new plugin
2.6, 2.7 search and install
In the search box write the name all in one wp migration and than you will get a plugin which have same name.
2.7 click on install
Note: It's same as like as 1.6 and 1.7 in this case I used same image
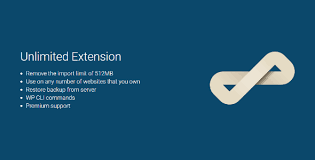
2.8 Download all in one wp migration unlimited extension
You can't migrate a wordpress website by all in one wp migration plugin without there premium extension when your site is bigger . In this case you should add the all in one wp migration unlimited extension.
Do you haven't the extension? Don't warry we have the premium extension and you can download it from our site with a connected licenses. It's free for you

2.9 Install and active the extension
Click on Plugins than click on Add New Plugin

2.10 Upload Plugin
Click on Upload Plugin
than click on Browse
than select the plugin zip files which you download from our site
than click on Install
2.11 Activate Plugin
Click on Activate Plugin
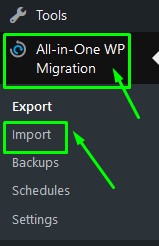
2.12 Import
Click on All in one wp migration
Than Click on Import
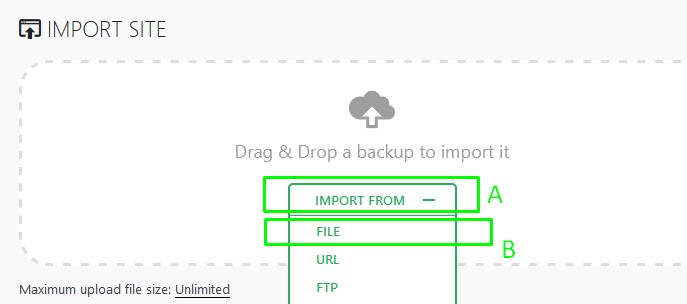
2.13 Select Files
Click on Import Form
Than Click on File
Than select the files which you was download from Step 1.11
Note: Please don't reload the screen untill complete the process.
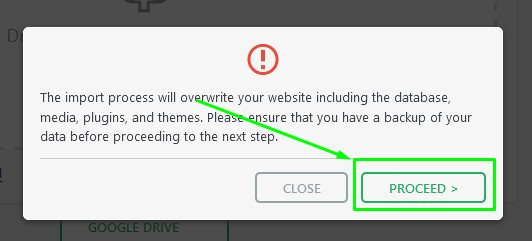
2.14 Proceed
After complete the upload process click on Proceed
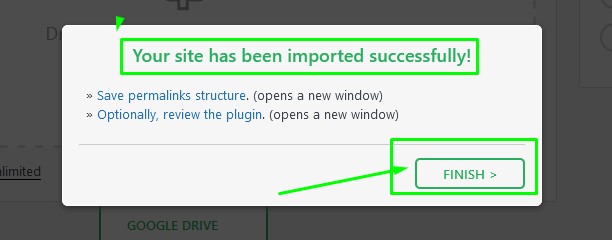
2.15 Finish
After complete everything click on finish
If you want you can change the permalink by click on save permalinks structure It will redirect you in new tab and login the site by using same user name and password which have in the old site. after that just click on save changes

Done
Well Done!!! Now our site is migrated in new server. You can check everything. I hope this content Migrate WordPress Website Using All in one wp migration plugin is helpful for you