Step 1 Download WordPress
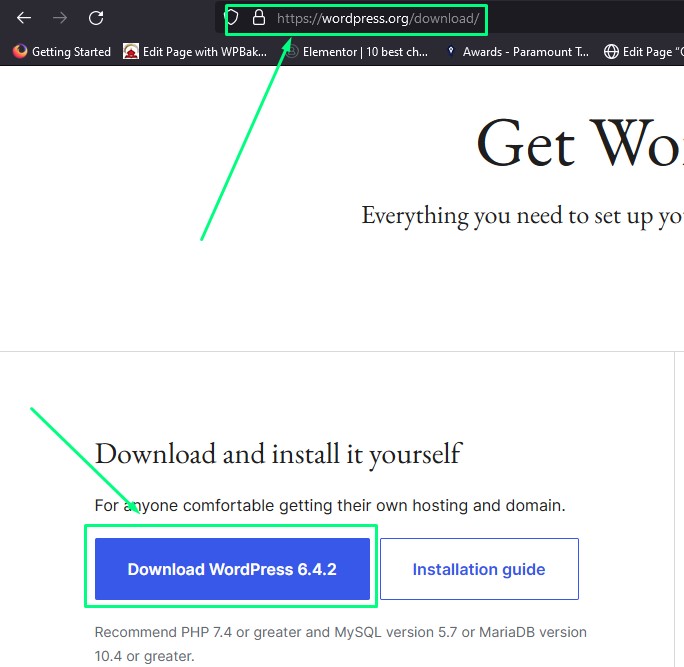
For Manually install and setup wordpress in hosting at first we should download wordpress
1.1 Go to Google and than go to the url wordpress.org
1.2 Click on download wordpress
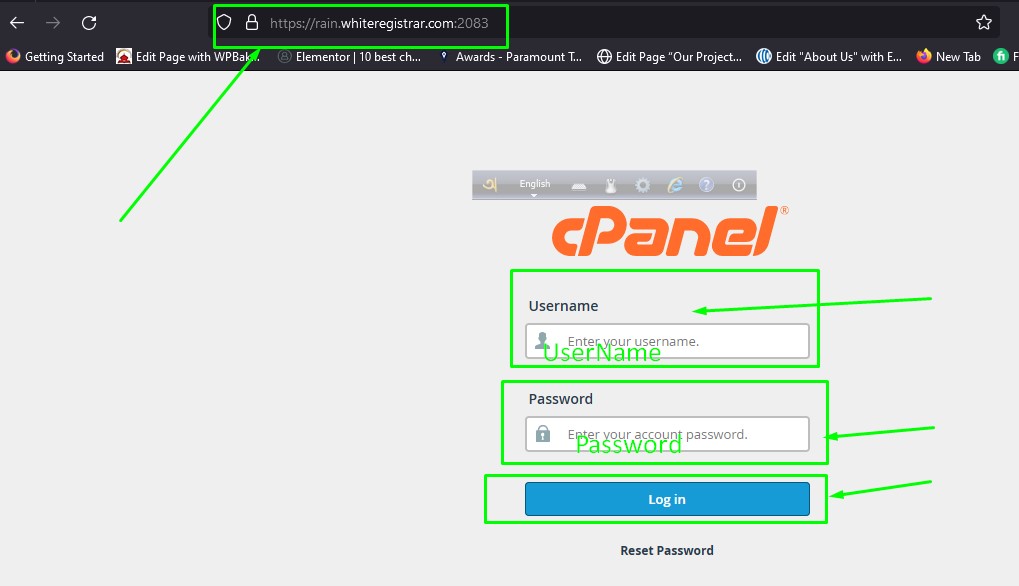
Step 2.1 login your cpanel
At first you should login your cpanel. you can login your cpanel by write your-domain-name.com:2083
If this link will not work than you should follow the cpanel link which your hosting provider was provide you when you purchase hosting.
Or You should login your hosting pannel for get cpanel url
2.2 visit your login url
2.3 Write user name and password
2.3 Click on login
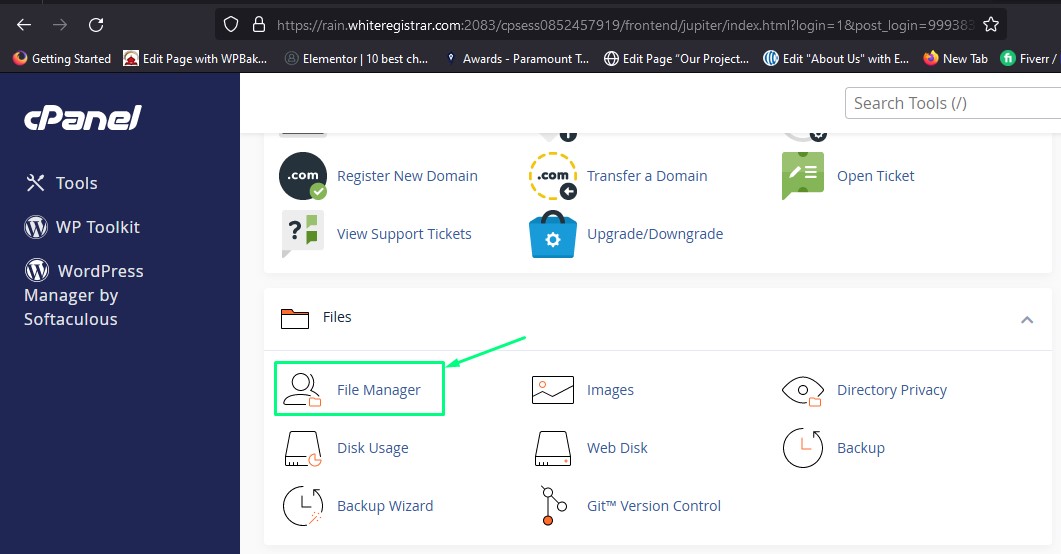
Step 2.4 Click On File Manager
After, login your cpanel than scroll down and click file manager
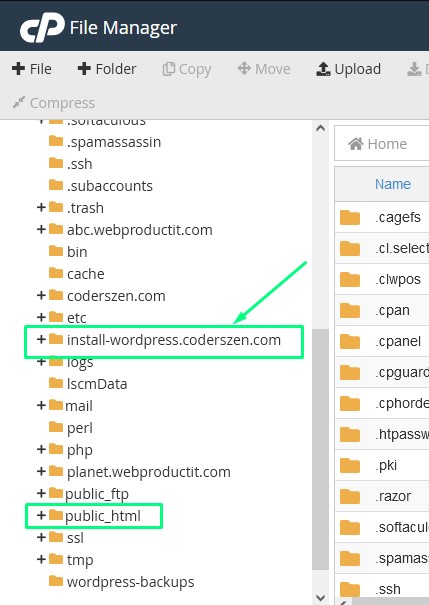
Step 2.5 Select the area
It's important to select the collect area. Because, if you download upload the files correctly, It will not work. We are going to install wordpress In install-wordpress.coderszen.com . In this case we are going to click on it.
If you want to install wordPress in main-domain than click on public_html
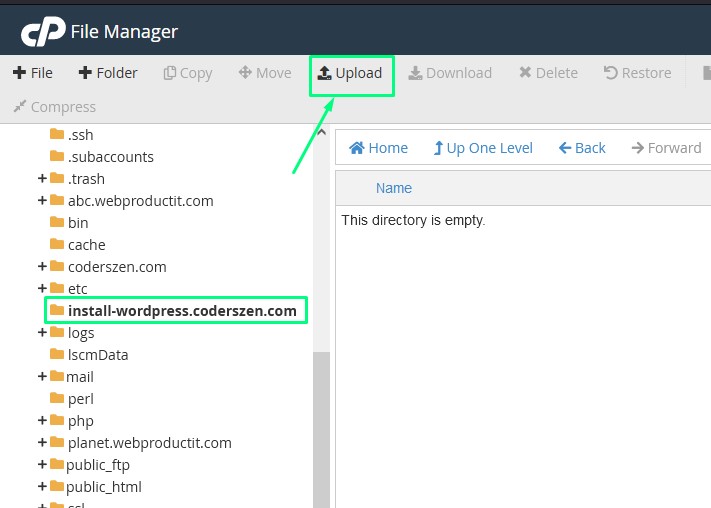
Step 2.6 Click On Upload
Now, Click on upload
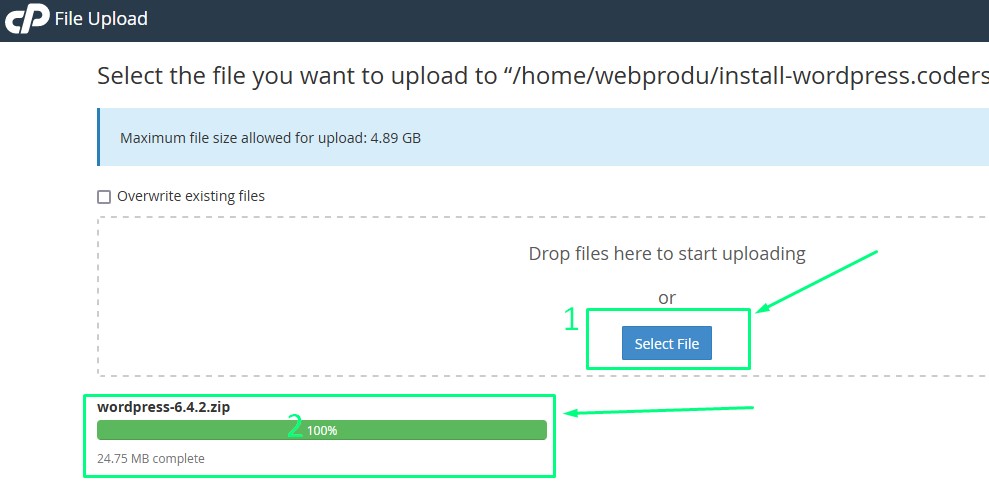
Step 2.7 Select Files
Click on Select Files and than select the files which you downloaded from wordpress.org, wait untill complete the upload process and after complete the process reload the uploaded area
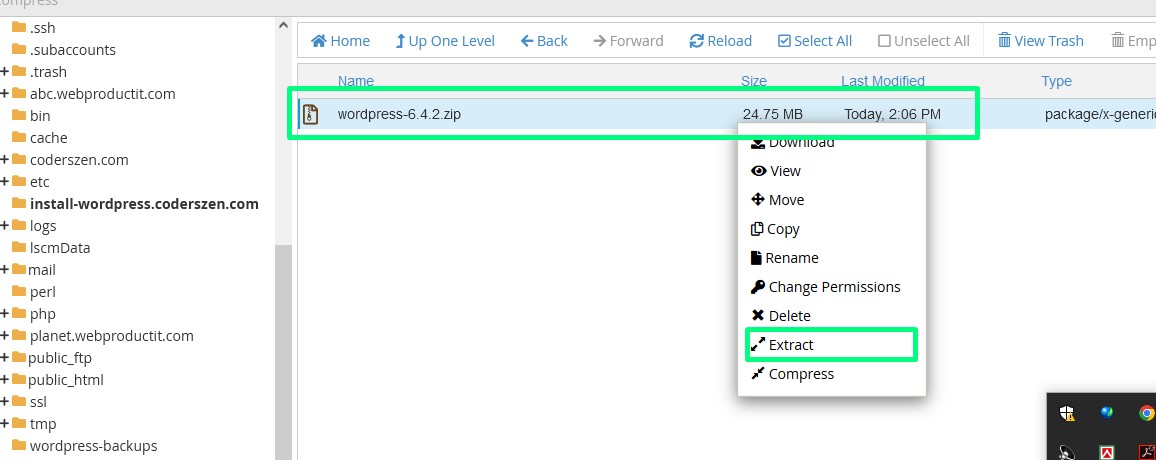
Step 2.8 Extract The Files
Write click on the files and click on Extract Than Click On Extract Files Than open WordPress Files
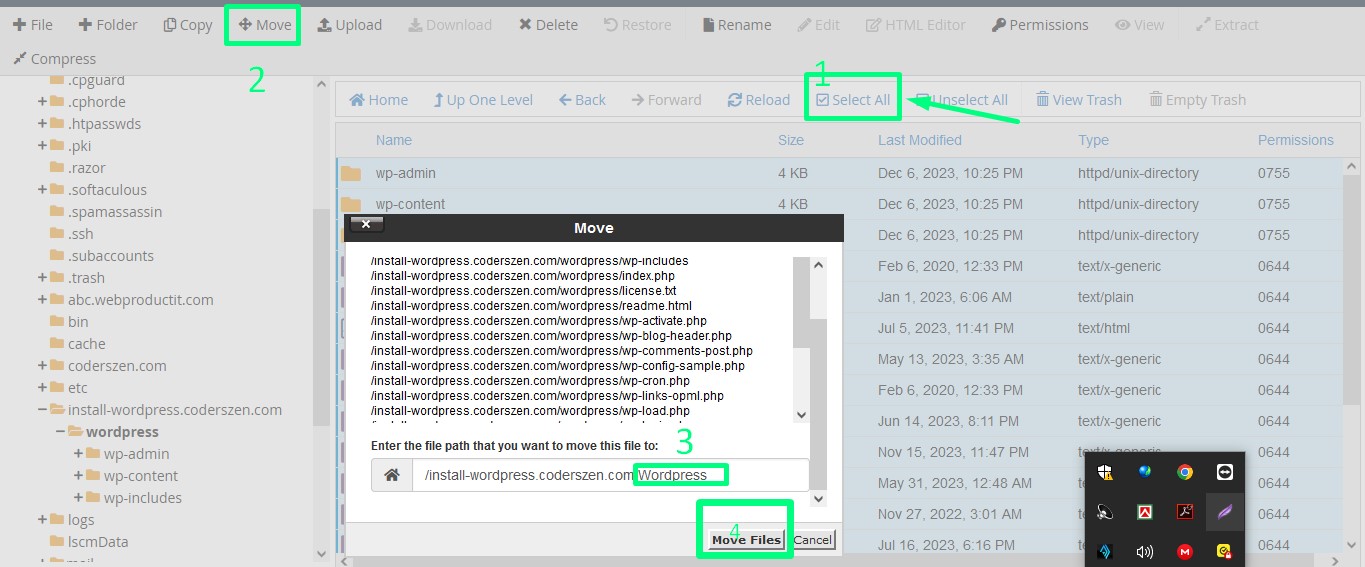
Step 2.9 Move
Now, we should change the files directory 1. select the box (Select Tab)
Than Click On 2. Move
Than remove the 3. WordPress from move location
Than Click On 4. Move Files
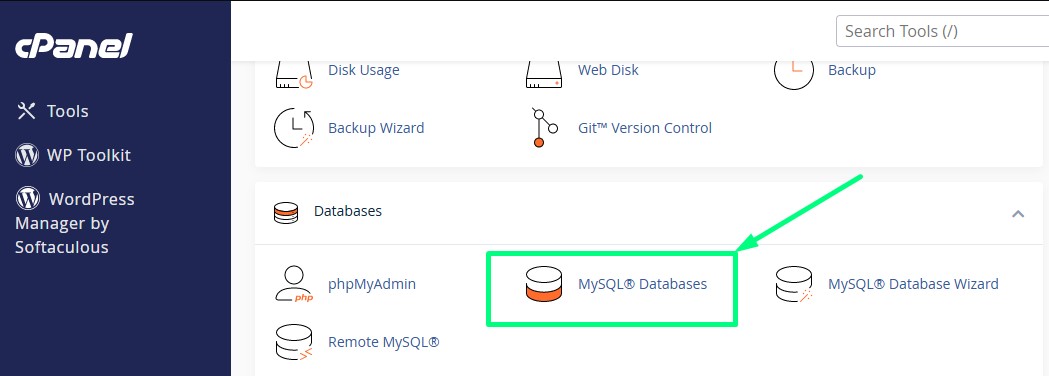
Step 3.1 Click On MySQL Databases
From cpanel click on MySQL Databases
Note: Don't forget to save the datase name, user name and password from step 3.2, 3.3 in a text files

Step 3.2 Create Databases
Write the databases name in the box and than click on Create Database than click on Go back
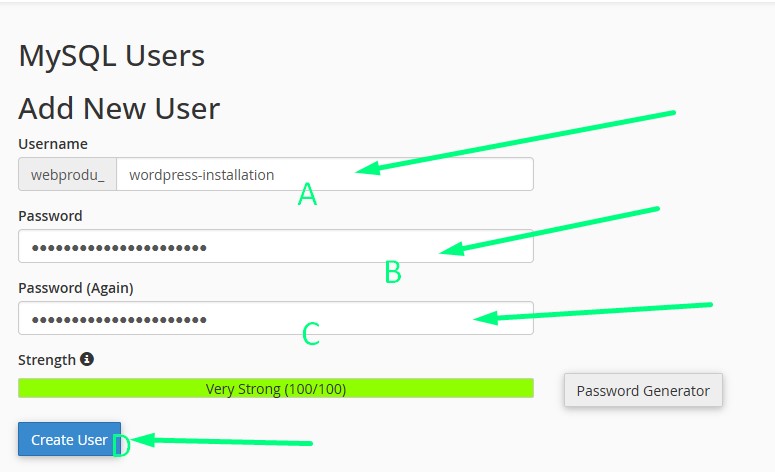
Step 3.3 Create User
Scroll down and go to Add New User secton, Write the user name in the box and than write a password, than click on Create user than click on Go back
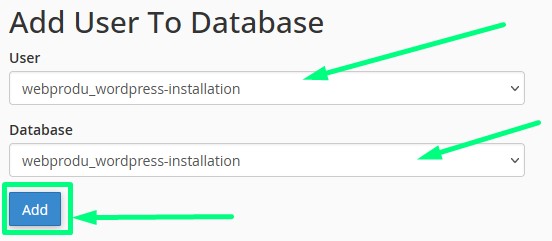
Step 3.4 Connect The Databases With User
Scroll down and go to Add User To Database secton, select the database and user, than click on Add
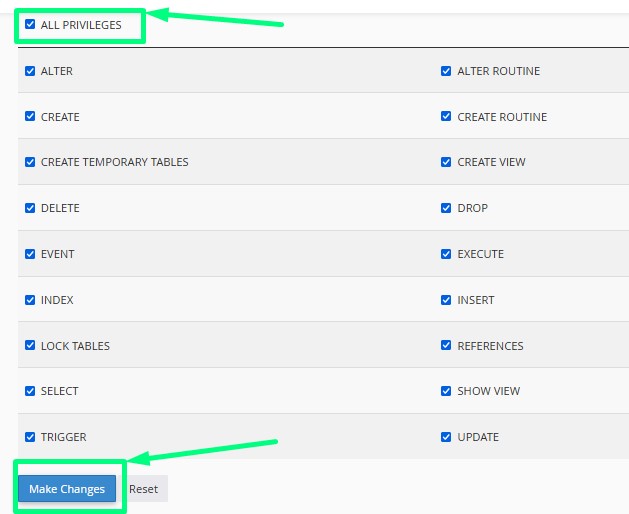
Step 3.5 ALL PRIVILEGES
Select ALL PRIVILEGES and than click on Make Changes
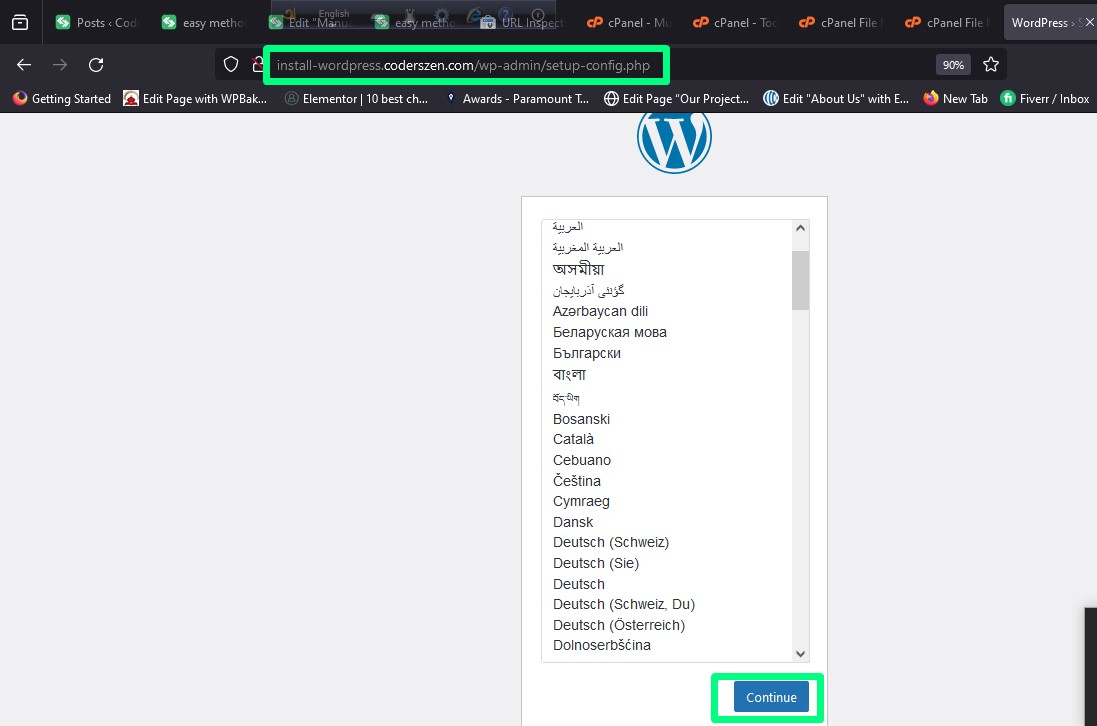
Step 4 Go To Google And Write The Url
Go to Google and than write the url http://your-domain-name/wp-admin/setup-config.php Or, if you just write your domain name it will redirect to you in this url
Click on Continue
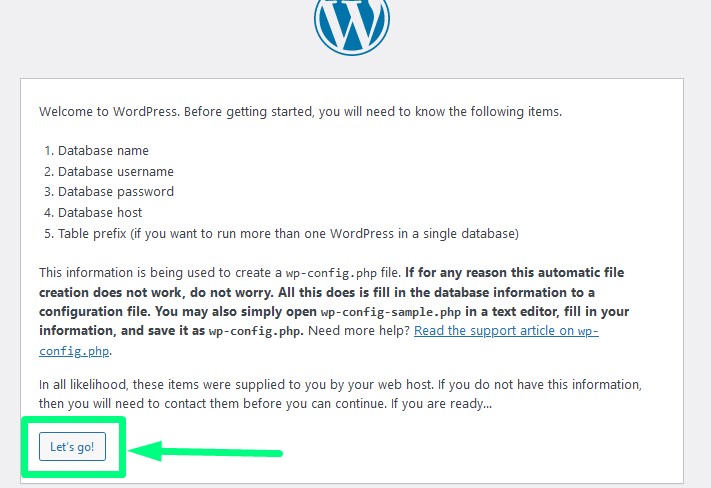
Step 4.1 Let's Go
We already have the Database name,
Database username,
Database password,
Database host, so now, Click On Let's Go
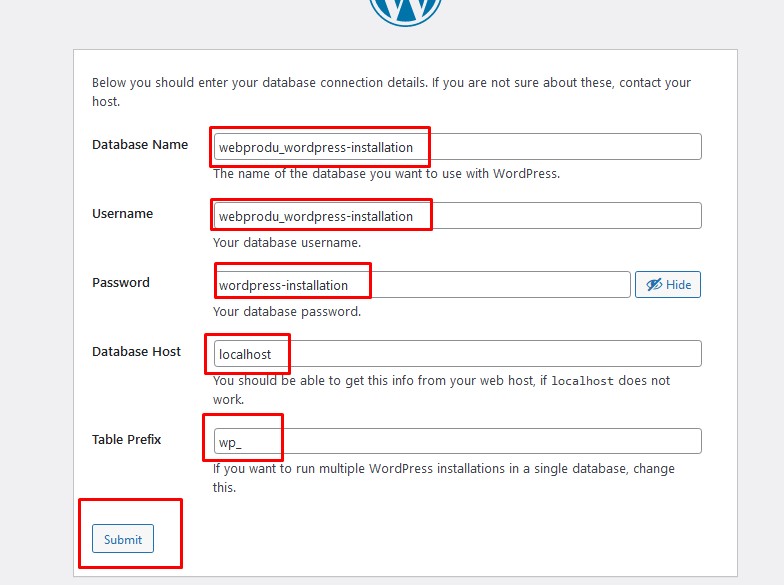
Step 4.2 Setup WordPress
We already have the Database name,
Database username,
Database password,
Database host, so now, we should use them one by one
Write the Database Name which you were make from step 3.2
Write the Database User Name which you were make from step 3.3
Write the Database User Password which you were make from step 3.3
No need to change the Database host it always should be local host
You can change the Table Prefix example cd_ not required
Now click on submit
Than Click On Run The Installation
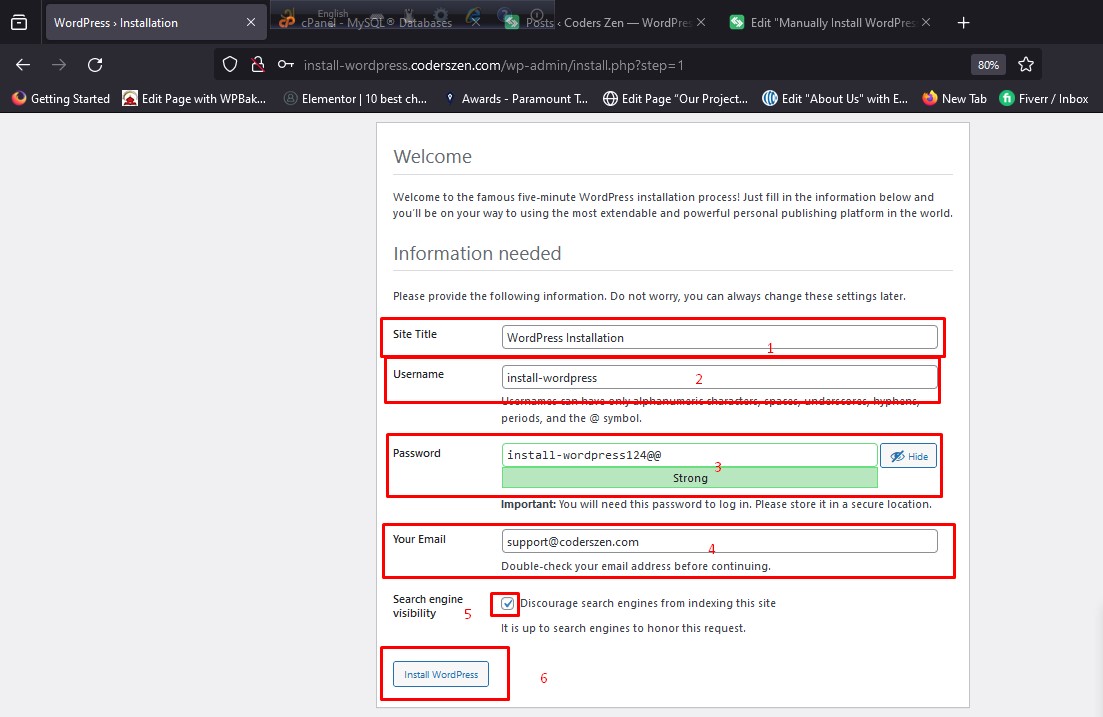
Step 4.3 Setup Login Access
It's time to setup wordpress login access.Note that we will used it to login our wordpress dashboard.
Site Title Write a site titles for your site
User Name Write a user name for your site.
Password Make a password for your website
Now click on Install WordPress
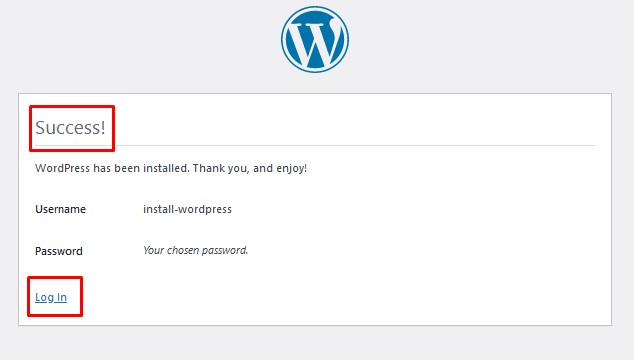
Success
If you do everything correctly than you will get the screen success. You can login your site by click on login